

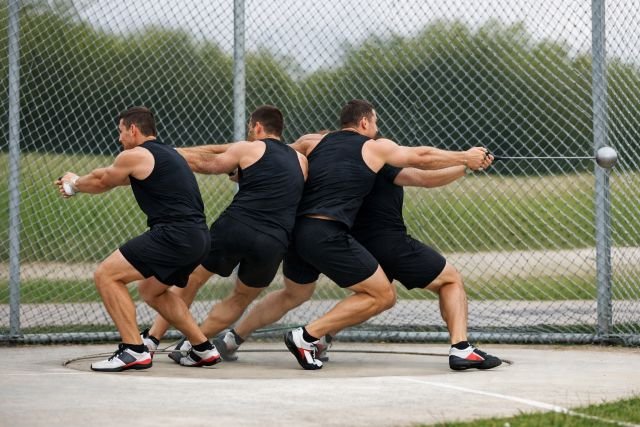
Hammer throwing looks wild from the stands, but the best throwers aren’t “muscling” the ball — they’re controlling a smooth, repeatable system. In this guide to hammer throwing hammer technique, you’ll learn how to build your spins step by step, so the hammer stays on-plane, your feet stay on-time, and the release happens on purpose (not by accident). We’ll break down the winds, entry, turns, and delivery with practical cues you can use immediately, plus common mistakes, fixes, and drills that translate into better control and longer throws.
- What “control” really means in hammer throwing
- Hammer throwing hammer basics
- Hammer throwing hammer grip and posture
- Winds and entry: set the orbit you want to keep
- The step-by-step spins: how to build turns for better control
- Turn 1: establish balance and timing (don’t chase speed yet)
- Turn 2: start adding speed while keeping the orbit consistent
- Turn 3: accelerate without losing the circle
- Turn 4 (if you use it): polish and prepare the delivery
- The delivery and release: where control becomes distance
- The most common control problems (and fast fixes)
- Drills that improve hammer throwing hammer control (without guessing)
- Safety and durability: control includes staying healthy
- FAQ
- Conclusion: make your hammer throwing hammer spins predictable, then faster
You’ll also see why elite technique is organized into distinct phases — preparation, transition, double support, single support, and release — because your job is to accelerate the implement while staying balanced and connected.
What “control” really means in hammer throwing
Control isn’t “slowing down.” In hammer throwing, control means:
- The hammer’s orbit stays consistent (same tilt and shape each turn).
- Your body stays ahead of the hammer just enough to keep tension (connection) without getting yanked.
- Your foot contacts and support phases happen on time, so speed builds across turns instead of leaking away.
Research and coaching analyses consistently point to hammer speed at release as a major driver of performance, and that speed is built primarily during the turns.
Hammer throwing hammer basics
Before we get into spins, it helps to be clear on what you’re trying to create: a stable orbit that you gradually accelerate.
Quick definition for featured snippets
Hammer throwing technique is the coordinated sequence of winds, entry, turns, and release that accelerates the hammer through alternating double-support and single-support phases while maintaining balance, posture, and tension through the arms and trunk.
Equipment note (why it matters for control)
The hammer is a ball attached to a wire and handle. Official implement weights differ by category (for example, senior men use 7.26 kg and senior women use 4 kg in standard competition). Implement specs vary across age groups, so training with the right weight is part of “control.”
Hammer throwing hammer grip and posture
A clean throw starts with a grip you can trust, because your hands are your only connection to the hammer.
Grip cues (simple, repeatable)
- Let the handle sit deep enough to avoid “white-knuckle” squeezing.
- Keep wrists neutral — avoid cocking them back, which often breaks connection when speed rises.
- Think “long arms” rather than “strong arms.” Your arms transmit force; they shouldn’t be the main engine.
Posture cues that protect control
- Tall chest, ribs stacked over hips.
- Head quiet, eyes level.
- Weight balanced mid-foot so you can turn without tipping.
If your posture collapses, the hammer will usually rise and pull you off-plane, forcing rushed footwork later.
Winds and entry: set the orbit you want to keep
Many control problems in turns are actually entry problems. If your entry is late, high, or disconnected, you’ll spend the next three turns “saving it.”
Winds (the setup)
Your winds should establish rhythm and a predictable hammer path.
Helpful wind checkpoints:
- The hammer stays smooth (no sudden jerks).
- Your shoulders and hips feel “connected,” not twisted apart.
- You can feel tension in the wire without yanking.
A common coaching model breaks technique into preparation and transition phases before the turns — treat winds as preparation, and entry as transition.
Entry (the moment that decides your timing)
The entry moves you from winds into the first turn without dumping balance.
Key entry cue for control:
- Lead with the feet, not the hands. If you “throw” the hammer into the first turn with your arms, it usually climbs and drags you.
What you want instead:
- The hammer “falls” into the turn as you rotate under it.
- Your torso stays tall while the hammer’s low point (the low point of the orbit) is predictable and repeatable.
The step-by-step spins: how to build turns for better control
This is the heart of hammer throwing hammer technique. Most throwers use 3 or 4 turns. The goal is not to sprint through them — it’s to increase speed each turn without losing orbit shape.
Turn structure: double support vs single support
A widely used technical breakdown describes alternating phases:
- Double support: both feet on the ground (typically where most acceleration is “expressed”)
- Single support: one foot off the ground as you reposition (where you preserve posture, timing, and orbit)
You’ll often hear “be patient in single support, aggressive in double support.” That’s a useful simplification—because rushing single support usually makes you late to the next double support.
Turn 1: establish balance and timing (don’t chase speed yet)
Turn 1 is the foundation turn. If you lose control here, everything after becomes survival.
What to feel
- The hammer stays “in front” enough that you can keep tension.
- Your rotation feels smooth, not hurried.
- You finish the turn in balance, ready for the next.
Control cues
- “Turn around a tall spine.”
- “Let the hammer pull — don’t pull the hammer.”
- “Quiet shoulders, active feet.”
Common mistake
- Over-rotating the shoulders early, which often makes the hammer climb and forces a stumble.
Fix
- Slow your upper body and speed up your feet. Think: feet lead, torso follows.
Turn 2: start adding speed while keeping the orbit consistent
Turn 2 is often where throwers either get the hang of connection—or start yanking.
What to feel
- Slightly more tension than Turn 1.
- The orbit tilt stays similar (not suddenly more vertical or more “canted”).
Control cues
- “Push the ground away in double support.”
- “Stay ahead of the hammer by inches, not feet.”
- “Keep the low point consistent.”
Biomechanics reviews emphasize that the throw involves large forces and complex coordination; keeping a consistent orbit helps you apply force effectively without breaking posture.
Turn 3: accelerate without losing the circle
Turn 3 is where a lot of throws are won or lost. You’ll feel the hammer getting heavy. Your job is to keep your system together.
What to feel
- More stretch through the trunk and hips.
- Faster rotation, but still “organized.”
Control cues
- “Long left side” (for right-handed throwers) to prevent collapsing inward.
- “Step under the hammer, not away from it.”
- “Don’t rush the pickup — arrive early.”
Common mistake
- Feet get fast but land narrow, causing you to tip and lose the orbit.
Fix
- Widen the base slightly (without sitting). You want stable, not flat.
Turn 4 (if you use it): polish and prepare the delivery
Not everyone needs four turns. A fourth turn can add speed, but only if you can keep timing.
What to feel
- The same orbit you’ve had, just faster.
- You’re still balanced enough to deliver.
Control cues
- “Same turn, faster hammer.”
- “Finish tall.”
- “Be early to the final double support.”
If Turn 4 makes you panic, you’ll usually throw worse than with three clean turns.
The delivery and release: where control becomes distance
The release isn’t a separate “throw.” It’s the last expression of the speed you built in turns.
What the best deliveries have in common
- The thrower stays tall into release.
- The hammer leaves on a consistent sector line.
- The arms stay long; the body turns and “lets it go.”
World Athletics’ hammer overview and coaching resources emphasize clean technique and safe execution from within the circle and cage environment.
Release cue for better control
- “Turn and let the hammer pass.”
If you try to “hit” the release with your arms, the hammer often goes left/right (and sometimes into the cage).
The most common control problems (and fast fixes)
1) The hammer climbs (gets too high)
Why it happens: pulling with the arms, collapsing posture, or an entry that throws the hammer up.
Quick fix: keep the chest tall and think “orbit forward,” not “lift.”
2) You get pulled left (right-handed thrower)
Why it happens: you’re behind the hammer, so it drags you.
Quick fix: be earlier with the feet and keep the torso slightly ahead of the implement.
3) You’re rushing turns and stutter-stepping
Why it happens: panic in single support and late arrival to double support.
Quick fix: slow the pickup, land calmly, then accelerate in double support.
4) You feel “no tension” in the wire
Why it happens: bent arms, loose shoulders, or the hammer orbit drifting.
Quick fix: long arms + stable trunk; stop trying to steer with your hands.
Drills that improve hammer throwing hammer control (without guessing)
You asked for actionable, real-world insights — these are widely used progressions that build timing and orbit consistency.
Entry rhythm drill
Do 2–3 winds, then a controlled entry into a “pause” position before completing the turn. This teaches you to stop launching the hammer into Turn 1.
Two-turn quality sets
Instead of always going full throws, do sets of two turns and stop. Your goal is identical orbit and foot timing each rep, then build to three.
Heavy-light contrast (carefully)
Use a slightly heavier implement for controlled turns, then return to normal weight to feel speed with the same rhythm. Implement selection should match your training age and technical stability.
Video orbit check
Record from behind and from the side:
- Behind: look for a stable sector line and consistent orbit tilt.
- Side: look for tall posture and long arms.
Safety and durability: control includes staying healthy
Hammer throw places meaningful stress through the shoulders, spine, hips, knees, and ankles due to repeated high-force rotation. Injury reviews in throwing athletes highlight that shoulder and upper-extremity issues occur across throwing sports, and managing load plus technique quality matters.
Practical durability rules:
- Don’t chase max-effort throws every session.
- Prioritize quality turns and stop sets when technique breaks.
- Build trunk strength and hip mobility so posture doesn’t collapse under speed.
FAQ
How many spins should I do in the hammer throw?
Most throwers use three or four turns. Choose the number that lets you increase hammer speed each turn while staying balanced and consistent — three clean turns usually beat four rushed ones.
What is the most important part of hammer throwing hammer technique?
For most athletes, the biggest performance driver is building speed through the turns while keeping a consistent orbit and posture, because release speed strongly influences distance.
Why do I lose control in the last turn?
Usually because you arrive late to double support (rushing single support), your posture collapses, or you start pulling with your arms. Fix it by slowing the pickup, staying tall, and letting the feet lead.
Should I pull the hammer with my arms?
No. Your arms should stay long and connected while your body rotation and ground interaction create acceleration. Pulling typically makes the hammer climb and breaks timing.
How do I stop fouling out of the circle?
Fouls often come from being pulled off balance late in the throw. Improve entry timing, keep turns patient, and practice stopping after 2–3 turns to train control before adding more speed.
Conclusion: make your hammer throwing hammer spins predictable, then faster
If you want better distance, start by demanding better control. The core of hammer throwing hammer technique is simple to describe and challenging to master: set a clean orbit in the winds, enter on time, and build speed across turns while staying tall and connected. When your single support stays calm and your double support arrives early, the hammer accelerates without chaos — and the release becomes a smooth finish to a throw you already built.