

A well-installed handrail does more than support movement — it enhances home safety, adds architectural detail, and ensures compliance with building codes. Whether upgrading a staircase, renovating a porch, or improving accessibility, understanding how handrails work and how to install them properly is essential. This guide breaks down everything you need to know, from safety standards and style choices to installation techniques and troubleshooting common issues.
- Understanding the Purpose of a Handrail
- Building Codes and Safety Requirements for Handrails
- Choosing the Right Handrail Style for Your Home
- Tools and Materials Needed for Installing a Handrail
- How to Install a Handrail: Step-by-Step Instructions
- Common Handrail Installation Mistakes and How to Avoid Them
- Exterior Handrail Installation Considerations
- Interior Design Tips for Handrails
- Maintenance Tips for Long-Lasting Handrails
- FAQs for Quick Answers
- Conclusion
Understanding the Purpose of a Handrail
A handrail is a structural safety feature designed to provide stability and support along stairways, ramps, landings, and balconies. Most building authorities report that stair-related accidents account for over one million injuries annually in the U.S. alone, according to the National Safety Council. A properly placed handrail significantly reduces these risks by offering secure grip assistance and visual guidance.
Handrails are not just safety features — they’re also a design element that can transform a space. The right material, shape, and installation method can elevate any interior or exterior.
Building Codes and Safety Requirements for Handrails
Before starting any installation, familiarize yourself with local building codes such as the International Residential Code (IRC) or the International Building Code (IBC). These standards ensure that your handrail provides adequate safety and accessibility.
Most jurisdictions require that handrails meet certain criteria. The typical height range is between 34 and 38 inches above the stair nosing. This height ensures that individuals of different statures can safely grip the rail. The graspability dimension is also regulated; usually, the diameter of round rails must be between 1.25 and 2 inches, allowing the average hand to wrap securely around the rail without excessive strain.
Handrail continuity is another important requirement. A safe handrail should run uninterrupted for the full length of the stairway. This enhances user confidence and stability. Some codes also require returns at the ends of the rail, meaning the handrail should curve back toward the wall or newel post to prevent clothing or bags from catching.
You can explore these guidelines in more detail through the IBC website or your local building authority’s published code documents.
Choosing the Right Handrail Style for Your Home
When selecting a handrail, explore the variety of styles, shapes, and materials available. Your choice depends on aesthetics, durability needs, maintenance expectations, and where the rail will be installed.
1. Wooden Handrails
Wooden handrails offer a warm and classic appearance. Popular in residential homes, they match well with traditional and transitional design styles. Hardwoods such as oak, maple, and walnut are known for their durability and smooth finish. Wooden handrails can be stained or painted for a custom look. Indoors, they provide excellent longevity; outdoors, they require sealing to resist moisture and UV damage.
2. Metal Handrails
Metal handrails — aluminum, stainless steel, wrought iron — are valued for their strength and sleek, modern appearance. Stainless steel is particularly popular for contemporary staircases and industrial-style interiors. Metal rails require low maintenance and are highly resistant to weather, making them ideal for exterior applications.
3. Composite and Vinyl Handrails
Composite materials combine durability with minimal upkeep. Vinyl-coated rails remain smooth, weather-resistant, and versatile in outdoor decks and ramps. They don’t splinter or warp, making them a favorite for accessibility features and long-term installations.
4. Glass and Cable Rail Systems
For homeowners wanting an unobstructed view, glass or cable rails paired with a handrail provide a refined and open look. These are common in luxury renovations or when maximizing natural light is a priority. Although they cost more, they elevate the overall appearance of staircases and balconies.
Tools and Materials Needed for Installing a Handrail
A typical handrail installation requires several tools. Having these ready ensures smooth progress and professional results. Standard tools include a drill, level, measuring tape, stud finder, hand saw or power saw, wood glue or adhesive, sandpaper, screws suitable for rail brackets, and protective gear.
Depending on your rail type, specialized components such as end caps, turnouts, or joint connectors may also be needed. When installing into concrete, use masonry anchors; for wood studs, standard screws will suffice.
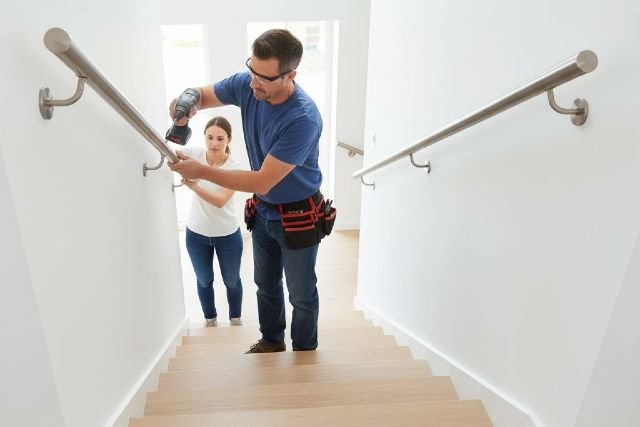
How to Install a Handrail: Step-by-Step Instructions
Proper installation is critical for safety and longevity. While methods vary by rail type, the following general procedure applies to most handrail installations.
Step 1: Measure and Mark the Handrail Height
Begin by determining the correct handrail height according to local codes. Mark two points at the top and bottom of the stair that align with this height. Use a chalk line or long level to connect these points. This long, straight guideline ensures your handrail remains perfectly aligned.
Step 2: Locate Wall Studs
Handrails must be anchored securely into wall studs. Using a stud finder, locate and mark each stud along the stairway wall. Attaching brackets to studs enhances structural support and prevents the rail from loosening over time.
Step 3: Install the Mounting Brackets
Position the brackets along the guideline and align them with your stud marks. Use the drill to secure the brackets firmly. Keep the spacing consistent for optimal support. The typical recommendation is to place brackets no more than 4 feet apart.
Step 4: Prepare the Handrail
Cut the handrail to the correct length based on your measurements. Sand the edges to remove splinters or roughness. If your handrail requires end caps or returns, install these components using screws or adhesive.
Step 5: Attach the Handrail to the Brackets
Lift the handrail into position and secure it to each bracket. Make minor adjustments to ensure the rail remains level. Check stability by applying gentle pressure to various points along the rail.
Step 6: Finish and Inspect
After the handrail is attached, inspect the entire installation. Check for gaps, misalignment, or loose screws. Apply paint or stain if desired. Confirm that the handrail feels solid and provides comfortable grip support.
Common Handrail Installation Mistakes and How to Avoid Them
A frequent mistake during handrail installation is improper height placement. Installing too high or too low can lead to safety hazards and code violations. Always measure carefully using a level and refer to local code specifications.
Another common error is insufficient anchoring. Mounting brackets should always be secured to studs or suitable structural backing. Attaching them to drywall alone will lead to instability. Using the right fasteners ensures long-lasting support.
Some homeowners overlook handrail continuity, especially on longer staircases. A handrail should run smoothly without unnecessary breaks or abrupt transitions. Breaks can disrupt grip and reduce safety.
You might also encounter issues with aesthetics. A handrail that is not aligned with existing trim or architectural lines can appear awkward. Take time to plan an installation that complements your home’s design.
Exterior Handrail Installation Considerations
Outdoor handrails face different challenges. Exposure to moisture, sunlight, and temperature changes can degrade materials over time. This means choosing appropriate materials such as treated wood, powder-coated metal, or vinyl is crucial for exterior use.
Outdoor installations must comply with additional safety requirements. For example, deck handrails or porch rails often require a top rail height of at least 36 inches. Railings must also be designed to withstand higher lateral force loads, especially in areas with harsh weather.
To extend the lifespan of an exterior handrail, regularly clean the surface, remove debris, and reseal or repaint wooden rails annually. For metal rails, check for rust or corrosion.
Interior Design Tips for Handrails
Matching your handrail to the overall interior design theme can elevate any space. In modern homes, minimalist metal or cable rail systems create clean lines and visual openness. In traditional homes, wooden handrails paired with decorative balusters add warmth and character.
Color choice plays a significant role. Dark handrails against light walls create contrast and make stairways appear more dramatic. Using a finish that matches flooring or door trim ties elements together.
Lighting also enhances the appearance of a handrail. Consider LED strip lighting beneath the rail for a contemporary effect. Well-lit handrails improve visibility and accessibility.
Maintenance Tips for Long-Lasting Handrails
To keep your handrail in excellent condition, establish a maintenance routine. Clean wooden rails with a mild cleaner and polish them to restore sheen. Avoid harsh chemicals that could damage finishes. For metal rails, wipe them regularly to prevent dust buildup and use protective coatings to prevent rust.
Check for loose screws or shifting brackets periodically, especially in high-traffic households. Tightening connections ensures long-term stability and safety.
Outdoor handrails may require seasonal inspections to address weather-related wear. Replace damaged sections promptly and reseal as needed.
FAQs for Quick Answers
How high should a handrail be installed?
Most building codes require a handrail height between 34 and 38 inches measured from the stair nosing.
Do all stairs need handrails?
In most residential settings, stairs with four or more risers require a handrail. Check local building codes for specific rules.
What is the best material for an outdoor handrail?
Metal, vinyl, or composite materials offer the best weather resistance and longest lifespan for exterior handrails.
How many brackets do I need for a handrail?
Brackets should be spaced no more than 4 feet apart, with additional support at each end of the handrail.
Conclusion
A well-installed handrail enhances both safety and aesthetics in any home or commercial environment. By understanding building codes, selecting the right materials, and following best installation practices, you can create a secure and visually appealing staircase or walkway. Whether you’re a homeowner tackling a DIY project or a contractor seeking professional guidance, the techniques and tips in this guide will help ensure your handrail is safe, durable, and beautifully integrated into your space.