

If you’ve ever stitched a seam that looked fine under the machine, then somehow turned wavy, puckered, or slightly off once you opened it up, you’re not alone. The good news is you can make seams look calmer, straighter, and more professional with a simple approach: stick and stitch.
- What “stick and stitch” means in sewing
- Why seams get wavy or puckered, and why stick and stitch helps
- Stick and stitch tools: tape, glue, and when each is best
- Stick and stitch step-by-step: a stress-free workflow
- The quiet “pro habits” that make seams look perfect
- Stick and stitch in real life: three quick scenarios
- FAQ: quick answers for featured snippets
- Conclusion: stick and stitch your way to calmer seams
In sewing, stick and stitch means you temporarily “stick” fabric layers together with wash-away tape, washable fabric glue, or another removable basting adhesive so the fabric behaves while you sew. This reduces shifting, helps match notches, keeps slippery fabrics from drifting, and makes tricky seams feel far less stressful. Pair it with smart pressing and balanced tension, and your seams get noticeably cleaner.
What “stick and stitch” means in sewing
Stick and stitch is a seam-control method. You use a temporary adhesive to hold layers exactly where you want them, then you sew normally.
It’s not about permanently gluing a garment. It’s about using the smallest amount of temporary hold so your stitch line stays accurate and your seam allowance doesn’t slide or stretch.
Why seams get wavy or puckered, and why stick and stitch helps
Most “messy seam” problems are fabric-control problems, not talent problems. Even if your stitch length is good, seams can look off because the layers didn’t feed evenly. One layer creeps ahead, or a knit stretches, or a lightweight fabric shifts slightly as the presser foot moves.
Puckering can also come from thread tension. Coats explains “tension pucker” as something that happens when thread is sewn under too much tension, stretches during sewing, then relaxes afterward and gathers the seam.
Stick and stitch tackles the feeding issue by reducing layer shift. Then you finish the job with pressing and tension habits.
Stick and stitch tools: tape, glue, and when each is best
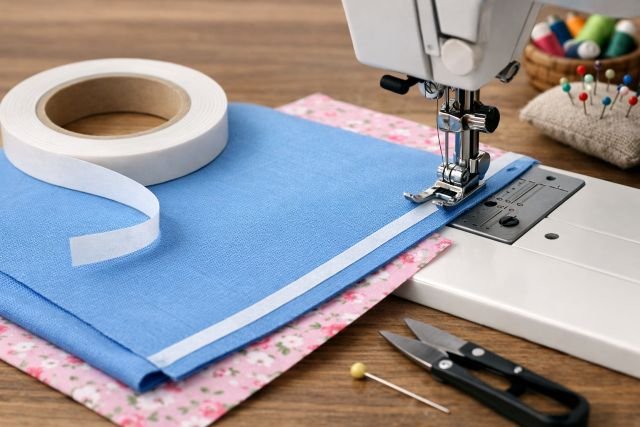
Wash-away seam tape is the most precise option for seam alignment, especially for zippers, hems, trims, and slippery fabrics. Because it’s designed for sewing applications, it’s widely used for holding seam allowances in place until stitching and washing.
Washable fabric glue sticks are excellent for quick basting when you want control without pinning. They’re especially helpful for hems, facings, and curved edges, because you can “set” the fold and stitch without fighting the fabric.
Spray basting is most useful when you need coverage over a larger area. It can be helpful for broad stabilization, although it’s usually less precise than tape for exact seam matching.
Stick and stitch step-by-step: a stress-free workflow
Start by prepping fabric so it feeds predictably. If the fabric is very shifty or lightweight, pressing and light stabilization can help. For knits, the right foot choice can matter, because minimizing stretch at the stitch line is half the battle.
Next, mark your seam line when accuracy matters, especially on curves, collars, princess seams, and narrow seam allowances. Marking the seam line gives you a clear path to stitch, even when the edges want to wander.
Then apply your adhesive inside the seam allowance and align your edges and notches. Keep the adhesive out of the exact needle path when possible, and use only a thin amount. The goal is “enough to hold,” not “enough to saturate.”
Now stitch with calm, even guiding. Let the feed dogs move the fabric. Your hands guide and support; they don’t pull the layers through. Pulling is a common cause of stretching and uneven feeding, especially on knits.
Finally, press the seam properly. SINGER notes that keeping seamlines straight while pressing, lifting rather than dragging, and allowing pressed areas to cool before moving helps prevent distortion and stretching out of shape. Pressing also improves the final look by setting stitches and flattening bulk.
The quiet “pro habits” that make seams look perfect
Needle condition matters more than most sewists expect. A slightly dull needle can create irregular stitches, skipped stitches, or fabric distortion. SCHMETZ recommends replacing needles approximately every eight hours of sewing time as a general guideline. If you are troubleshooting seam puckering, switching to a fresh needle is often a surprisingly effective first step.
Stitch density and stitch length also affect seam performance. Research on seam strength and seam behavior consistently finds stitch density influences strength outcomes, with results depending on fabric, thread, and stitch type. That doesn’t mean “tiny stitches are always better.” Very short stitches on lightweight fabric can concentrate thread and contribute to puckering or a “drawn up” seam. The goal is choosing a stitch length that suits the fabric’s weight and structure.
Thread tension is another common culprit when seams pucker even if they are straight. Coats’ explanation of tension pucker is useful because it highlights why puckers can appear later, not necessarily right away at the machine. If seams look flat at first and then “tighten up,” tension and thread behavior deserve a closer look.
Stick and stitch in real life: three quick scenarios
If you are sewing a slippery lining and it keeps finishing longer on one side, stick and stitch is a practical fix. Tape or glue-baste within the seam allowance at controlled intervals, align notches carefully, and stitch without pulling. The adhesive reduces creep so both layers feed more evenly.
If your knit hems wave no matter what you do, glue-basting the hem fold can help stabilize the edge before stitching. Press the fold into place, glue-baste lightly, stitch with a knit-appropriate setting, and then press again. SINGER’s guidance about lifting and letting sections cool before moving is especially helpful for knits and any fabric prone to stretching under heat and handling.
If you get rippling along a zipper, it’s often because the zipper tape and fabric shifted relative to each other. Wash-away tape can hold the zipper tape where you want it so you can stitch smoothly and avoid that “wonky wave” next to the teeth.
FAQ: quick answers for featured snippets
What is the stick and stitch method?
The stick and stitch method is a sewing technique where you temporarily adhere fabric layers together with a removable adhesive, then stitch the seam so the layers stay aligned and feed evenly.
Is stick and stitch better than pinning?
Stick and stitch can be better than pinning for slippery fabrics, knits, zippers, hems, and curves because it reduces shifting without pin distortion, which can help seams stay straighter.
Why are my seams puckering even when they’re straight?
Straight seams can still pucker due to excessive thread tension. Coats explains that thread can stretch during sewing under high tension, then relax and gather the seam afterward.
How often should I change my sewing machine needle?
SCHMETZ suggests a general guideline of replacing sewing machine needles about every eight hours of sewing time.
Does pressing really matter for seam quality?
Yes. Proper pressing helps seams lie flatter and reduces distortion. SINGER advises keeping seamlines straight while pressing, lifting rather than dragging, and allowing pressed areas to cool before moving them.
Conclusion: stick and stitch your way to calmer seams
Perfect seams come from controlling fabric, tension, and finishing steps, not from “having steady hands.” The stick and stitch method reduces shifting, prevents creep, and makes tricky seams easier to sew accurately. When you combine it with solid pressing habits, including letting pressed areas cool before moving them, the result is flatter, cleaner seams with less frustration.
If puckering still shows up, check needle freshness and tension next. SCHMETZ’s guideline of changing needles about every eight hours is a helpful baseline, and Coats’ explanation of tension pucker is a strong reminder that thread behavior after sewing can matter as much as what happens at the machine.